- Photo Safaris
- Alaska Bears & Puffins World's best Alaskan Coastal Brown Bear photo experience. Small group size, idyllic location, deluxe lodging, and Puffins!
- Participant Guestbook & Testimonials Candid Feedback from our participants over the years from our photo safaris, tours and workshops. We don't think there is any better way to evaluate a possible trip or workshop than to find out what others thought.
- Custom Photo Tours, Safaris and Personal Instruction Over the years we've found that many of our clients & friends want to participate in one of our trips but the dates we've scheduled just don't work for them or they'd like a customized trip for their family or friends.
- Myanmar (Burma) Photo Tour Myanmar (Burma) Photo Tour December 2017 -- with Angkor Wat option
- Reviews Go hands-on
- Camera Reviews Hands-on with our favorite cameras
- Lens reviews Lenses tested
- Photo Accessories Reviews Reviews of useful Photo and Camera Accessories of interest to our readers
- Useful Tools & Gadgets Handy tools and gadgets we've found useful or essential in our work and want to share with you.
- What's In My Camera Bag The gear David Cardinal shoots with in the field and recommends, including bags and tools, and why
- Articles About photography
- Getting Started Some photography basics
- Travel photography lesson 1: Learning your camera Top skills you should learn before heading off on a trip
- Choosing a Colorspace Picking the right colorspace is essential for a proper workflow. We walk you through your options.
- Understanding Dynamic Range Understanding Dynamic Range
- Landscape Photography Tips from Yosemite Landscape Photography, It's All About Contrast
- Introduction to Shooting Raw Introduction to Raw Files and Raw Conversion by Dave Ryan
- Using Curves by Mike Russell Using Curves
- Copyright Registration Made Easy Copyright Registration Made Easy
- Guide to Image Resizing A Photographers' Guide to Image Resizing
- CCD Cleaning by Moose Peterson CCD Cleaning by Moose Peterson
- Profiling Your Printer Profiling Your Printer
- White Balance by Moose Peterson White Balance -- Are You RGB Savvy by Moose Peterson
- Photo Tips and Techniques Quick tips and pro tricks and techniques to rapidly improve your photography
- News Photo industry and related news and reviews from around the Internet, including from dpreview and CNET
- Getting Started Some photography basics
- Resources On the web
- My Camera Bag--What I Shoot With and Why The photo gear, travel equipment, clothing, bags and accessories that I shoot with and use and why.
- Datacolor Experts Blog Color gurus, including our own David Cardinal
- Amazon Affiliate Purchases made through this link help support our site and cost you absolutely nothing. Give it a try!
- Forums User to user
- Think Tank Photo Bags Intelligently designed photo bags that I love & rely on!
- Rent Lenses & Cameras Borrowlenses does a great job of providing timely services at a great price.
- Travel Insurance With the high cost of trips and possibility of medical issues abroad trip insurance is a must for peace of mind for overseas trips in particular.
- Moose Peterson's Site There isn't much that Moose doesn't know about nature and wildlife photography. You can't learn from anyone better.
- Journeys Unforgettable Africa Journeys Unforgettable -- Awesome African safari organizers. Let them know we sent you!
- Agoda International discounted hotel booking through Agoda
- Cardinal Photo Products on Zazzle A fun selection of great gift products made from a few of our favorite images.
- David Tobie's Gallery Innovative & creative art from the guy who knows more about color than nearly anyone else
- Galleries Our favorite images
Getting started with drone photography: A Resource Guide
Getting started with drone photography: A Resource Guide
Submitted by David Cardinal on Fri, 06/16/2017 - 15:34
 There is plenty of information on the web about drone photography, but I’ve learned from experience that it is spread far and wide, and it can be very time consuming to get the bits you need. It can also be expensive if you order the wrong drone or even worse crash your drone because you were missing a key piece of information (yep, done that). So we’ve put together a resource guide that provides at least one approachable path for you to get started, have fun, and develop the confidence to push yourself and your drones further. We’ll be adding to this guide on a regular basis, so please let us know what additional topics you’d like to see included!
Picking a drone
There are hundreds of drones from dozens of companies, but to keep thing simple we’ll stick with the market leader, and excellent overall price performer, DJI. Staying within the DJI product line means that most of the controls and software features are the same between models, making it easy to upgrade and not have to relearn everything. Within DJI’s product line there are a few options for first-time droners:
DJI Spark
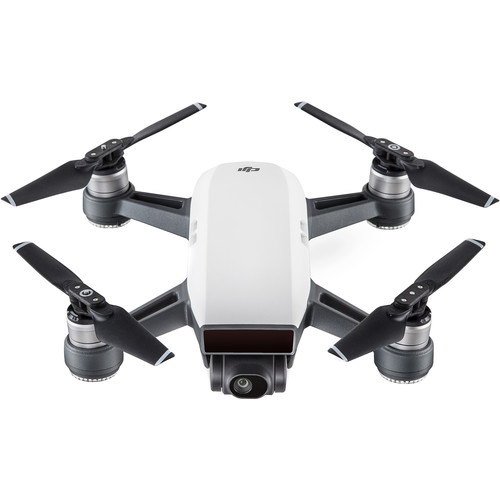 If you are really unsure whether you want to become a serious drone photographer or videographer, the Spark is a relatively-inexpensive (starts at $500) way to get started, and is the smallest of DJI’s drones. You can read my writeup on it for some more details. You’ll probably want the version that comes bundled with a controller and spare battery for $699. It is limited by having less than 20 minutes of flight time, and a maximum 1 mile range. Both of those limits are more important than they seem at first. Flight time because you really don’t want to push things to the edge, and you can spend a few minutes getting your drone in position and properly set up for your photography, so a nominal 20 minutes can quickly turn into 5-8 minutes of real shooting time. Range too is an ideal maximum. You’ll typically get less. So if you want to send the drone off to the top of a nearby hill for a scenic, you’ll need to be somewhat close to the top already.
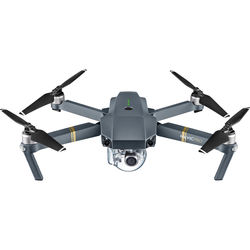
DJI Mavic Pro
The Mavic Pro is is our “Editors’ Choice” when it comes to a drone for serious hobbyists and many professionals. It borrows most of the fancy features from its big brother the Phantom, but folds up into an incredibly small package. I can easily fit my Mavic Pro, its controller, a spare battery, monitor shield, tablet, and spare props in my new favorite sling bag the Think Tank Turnstyle 20. I’ve already written about my first adventures with the Mavic Pro, and since then things have only gotten more exciting, as I’ve been doing more automated flying using the Litchi app, and going on longer missions. There is very little to not like about the Mavic Pro. You can get the Mavic Pro (including one battery and controller) for $999. You can get a bundle that includes two extra batteries, a charging hub, and a carrying bag for $1299.
DJI Phantom 4 Pro
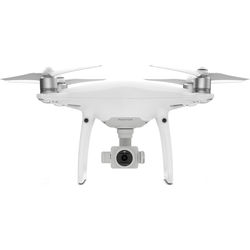 There are several models of the Phantom 4 now, but frankly, if you are going to upgrade to any of them from the Mavic Pro, it makes sense to go to the top of the line, the Phantom 4 Pro. By moving up to the Phantom 4 family, you get a larger (1-inch format), higher-resolution (20MP vs 12MP) sensor, 4K video at 60fps, longer flight time, … The camera sensor is the same one as in the Sony RX100 V, one of the best rated point and shoots on the market. The Advanced model also adds rear obstacle detection (a feature I’d definitely like to have on my Mavic!) and a pair of Time of Flight sensors (not that important). You can get the Phantom 4 Pro for $1399, or get one configured with a super-bright display for the Remote Control (called the Phantom 4 Pro+) for $1799.
Really-useful Accessories
There are dozens of interesting accessories for your drone, but we’ve picked out some we’ve found the most useful. In most cases, the specific model of accessory varies with the model of your drone, so we’ll provide links to the Mavic Pro version, for simplicity.
Additional Intelligent Battery
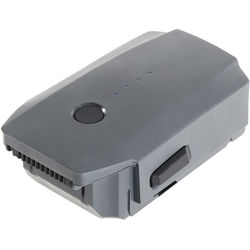 For starters, you’ll want to snag an extra battery. They’re expensive, but no matter how well you plan your drone outings, you’ll find you need more flight time than you think. For example, say you send the drone up, and then find you need a Neutral Density filter on it for the shot you want. Now you bring it back down, snap on the filter, and realize you’re part way through your battery and risking your mission. Having a backup will save the day. Plus, time flies by (pardon the pun) when you’re flying, and it is easy to leave the drone hovering while you figure out how to get it to do what you want, so having more flight time is a good thing. You can get one for the Mavic for $89.
Spare Propellers
The only time I’ve shattered a propeller on either of my Mavic Pro drones was when I crashed one (and there was a lot of other damage to worry about), but a spare set is cheap insurance in case you get one chipped up. Because the Mavic Pro sits very close to the ground when it lands, it doesn’t take all that much in the way of surrounding foliage to potentially nick one of your props. You can get a pair for $9.
Neutral Density Filter set
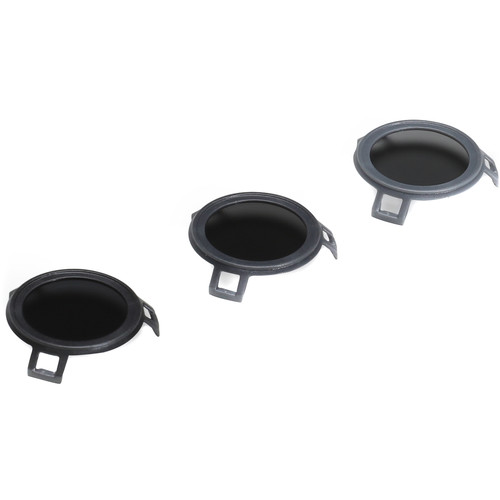 All the drones we’re talking about have fixed aperture lenses (just like your smartphone). That means in bright light, they need to use a very fast shutter speed. Resulting videos won’t look as smooth and “cinematic” as those shot with a slower shutter speed. The solution is to add a Neutral Density (ND) filter. Ideally you want to get the shutter speed to something not too much more than twice the frame rate. The Mavic Pro was not designed with filters in mind, and its gimbal motors have their hands full with just its camera. So DJI cautions against using any ND filters other than their own as it might cause your gimbal to wear out early. Fortunately their set of 3 is reasonably priced $35.
Software
For basic flying the free DJI GO 4 app is excellent – and free. It lets you exercise all the features of the drone, and has an increasing number of intelligent flight modes that allow for programmed operations. However, if you want to do complex cinematic shots, or simply traverse long routes, there are 3rd party packages to help.
Litchi for programmed flying
Once you want to put together smooth video shoots, or simply traverse extended or complex routes with your drone, you’ll outgrow DJI’s own app. That’s where Litchi comes in. For starters it lets you automate the process of creating 360-degree panoramas (either with JPEGs or RAW files). DJI now has some new panorama features, but they aren’t as extensive or flexible. Litchi also allow you to quickly plot waypoint-based routes using a mash up of Google Earth data, either in the mobile app or on its web site. It is a matter of seconds to drop a few waypoints down and tell Litchi how you want the camera to move and record. More sophisticated routes will take longer to plan, of course, and you may need to test fly them at first to make sure you are getting the results you want.
If I’m planning a mission of any distance, I actually feel safer leaving it to Litchi for the most part. Since I know where I’ve put the waypoints, and hopefully have said the altitudes high enough that the drone won’t hit anything, I can relax and watch the mission unfold rather than having to manually fly the entire time. Litchi also gives you lots of other clever modes, like Orbiting around a point of interest, and tracking. Many of those overlap with capabilities DJI offers or is likely to offer, so which you prefer may be a matter of personal preference. Litchi isn’t free, but it’s less than $25, so a pretty good deal as the software is actively supported and updated. It also has a very active user community.
AutoPilot
For iOS users, AutoPilot is a programmed-flight alternative to Litchi. I mostly fly with Android devices, so I can’t give a personal review, but it has been around for awhile and the developers do keep updating it for the latest drones and with additional capabilities.
AirData (formerly HealthyDrones)
AirData isn’t actually software. It is a website that let’s you look at and understand your flight logs. It pulls out an amazing amount of information (for example the calculated wind speed for each portion of your flight) that is really helpful as you try to plan parameters for future missions. It has a variety of plans, ranging from free to $10/month, depending on how fancy you want to get, how many drones you own, and how long you want them to archive your data. You get a free month of Pro with your purchase of Litchi.
Learning Resources
One of my first, and most expensive, lessons after getting a drone is that the official DJI tutorial videos are more about marketing than teaching. They gloss over a lot of the fine points that can get your drone into trouble. Fortunately there are many YouTube videos that do a much more thorough job. I suggest choosing more than one on each important topic, as not all presenters cover every aspect. We’ll work on trying to pull together a curated list of videos, and perhaps record some of our own, but in the meantime there is one site that does an excellent job of teaching programmed flying techniques using Litchi. It’s Phantom Film School, taught by Laurence Seberini.
Miscellaneous doo-dads
There are after market gimbal covers that leave a slot for the camera or integrate the clamp, tablet mounts of various shapes and sizes, leg extenders, and monitor shades available for the Mavic Pro. Some you can get through B&H or Amazon, while others are small-volume businesses selling on etsy or off their websites. We’ll add more detail on some of our favorites as we get more of them in to evaluate, but they’re out there!
- Log in to post comments

Latest posts
-
Tue, Jun 14 2022
-
Fri, Jul 9 2021
-
Mon, Mar 1 2021
-
Tue, Mar 3 2020
-
Wed, Jan 15 2020
-
Mon, Nov 11 2019