- Photo Safaris
- Alaska Bears & Puffins World's best Alaskan Coastal Brown Bear photo experience. Small group size, idyllic location, deluxe lodging, and Puffins!
- Participant Guestbook & Testimonials Candid Feedback from our participants over the years from our photo safaris, tours and workshops. We don't think there is any better way to evaluate a possible trip or workshop than to find out what others thought.
- Custom Photo Tours, Safaris and Personal Instruction Over the years we've found that many of our clients & friends want to participate in one of our trips but the dates we've scheduled just don't work for them or they'd like a customized trip for their family or friends.
- Myanmar (Burma) Photo Tour Myanmar (Burma) Photo Tour December 2017 -- with Angkor Wat option
- Reviews Go hands-on
- Camera Reviews Hands-on with our favorite cameras
- Lens reviews Lenses tested
- Photo Accessories Reviews Reviews of useful Photo and Camera Accessories of interest to our readers
- Useful Tools & Gadgets Handy tools and gadgets we've found useful or essential in our work and want to share with you.
- What's In My Camera Bag The gear David Cardinal shoots with in the field and recommends, including bags and tools, and why
- Articles About photography
- Getting Started Some photography basics
- Travel photography lesson 1: Learning your camera Top skills you should learn before heading off on a trip
- Choosing a Colorspace Picking the right colorspace is essential for a proper workflow. We walk you through your options.
- Understanding Dynamic Range Understanding Dynamic Range
- Landscape Photography Tips from Yosemite Landscape Photography, It's All About Contrast
- Introduction to Shooting Raw Introduction to Raw Files and Raw Conversion by Dave Ryan
- Using Curves by Mike Russell Using Curves
- Copyright Registration Made Easy Copyright Registration Made Easy
- Guide to Image Resizing A Photographers' Guide to Image Resizing
- CCD Cleaning by Moose Peterson CCD Cleaning by Moose Peterson
- Profiling Your Printer Profiling Your Printer
- White Balance by Moose Peterson White Balance -- Are You RGB Savvy by Moose Peterson
- Photo Tips and Techniques Quick tips and pro tricks and techniques to rapidly improve your photography
- News Photo industry and related news and reviews from around the Internet, including from dpreview and CNET
- Getting Started Some photography basics
- Resources On the web
- My Camera Bag--What I Shoot With and Why The photo gear, travel equipment, clothing, bags and accessories that I shoot with and use and why.
- Datacolor Experts Blog Color gurus, including our own David Cardinal
- Amazon Affiliate Purchases made through this link help support our site and cost you absolutely nothing. Give it a try!
- Forums User to user
- Think Tank Photo Bags Intelligently designed photo bags that I love & rely on!
- Rent Lenses & Cameras Borrowlenses does a great job of providing timely services at a great price.
- Travel Insurance With the high cost of trips and possibility of medical issues abroad trip insurance is a must for peace of mind for overseas trips in particular.
- Moose Peterson's Site There isn't much that Moose doesn't know about nature and wildlife photography. You can't learn from anyone better.
- Journeys Unforgettable Africa Journeys Unforgettable -- Awesome African safari organizers. Let them know we sent you!
- Agoda International discounted hotel booking through Agoda
- Cardinal Photo Products on Zazzle A fun selection of great gift products made from a few of our favorite images.
- David Tobie's Gallery Innovative & creative art from the guy who knows more about color than nearly anyone else
- Galleries Our favorite images
Bird photo blinds: Studios or Habitats?
Bird photo blinds: Studios or Habitats?
Submitted by David Cardinal on Tue, 05/08/2012 - 21:47
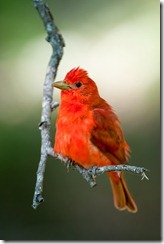 Having just returned from two weeks of really fun and very productive photography on some of the best private ranches in south Texas, I’ve had a lot of time to think and rethink about the design of the bird blinds we used, and some of the others we saw in use. In this case I’m not talking about the physical blind structures where we, the photographers, sit. That part of the blinds has continued to evolve for the better over the six plus years I’ve been shooting there. They are more comfortable and better positioned than ever. No, in this case I’m talking about the part of the blind where the real action is, the “stage” where birds and mammals hopefully appear and are photographed…
It is clear that there are two very different schools for designing the stage for a blind. For simplicity, I’ll call them the “studio” school and the “habitat” school. While the two approaches are not mutually exclusive, they require very different landscaping and shooting techniques. When taken to the extreme, creating the ultimate bird studio may make it impossible to get the ultimate habitat shot, and vice versa.
The Bird “Portrait Studio” Blind
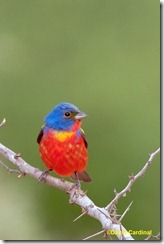 Bird studio purists (although I doubt they call themselves that), rely on one or maybe two carefully constructed perches, with a long, clear background and nothing else nearby to tempt birds as a landing spot. This way the photographers can focus (literally and figuratively) on their carefully constructed perch and wait for the action to happen. Typically the perch is held with a tripod stand and clamp or tied onto some metal “rebar”. With careful selection of the proper-sized perch (typically smaller branches for smaller birds, allowing the bird to wrap its feet around the perch), accompanied by careful plucking of wayward leaves and stems (as well as patching of any resulting scars on the perch), the ultimate studio-like setting is created.
Since the perch is at an exact and known distance, it is relatively simple to deploy additional lighting, if desired. Remote flashes can be set up near the perch – other shooters won’t be distracted by them since everyone is aiming for the same bird in the same place. This is a little like setting up a portrait studio with lights and waiting for shoppers at the mall (in this case birds looking for seed) to come through and have their photo taken.
Perhaps the ultimate practitioner of this technique is Alan Murphy, who has made an art out of his songbird studios, which he calls set-ups, and is happy to provide plenty of tips in his eBook -- Guide to songbird set-up photography. Many of his gorgeous images were taken on the lawn of his suburban home. If you’re living in an urban or suburban situation, some type of “studio” may be your only practical route to getting great images. Without the time, space, and resources to create a full habitat, you can capture amazing photographs in a small space.
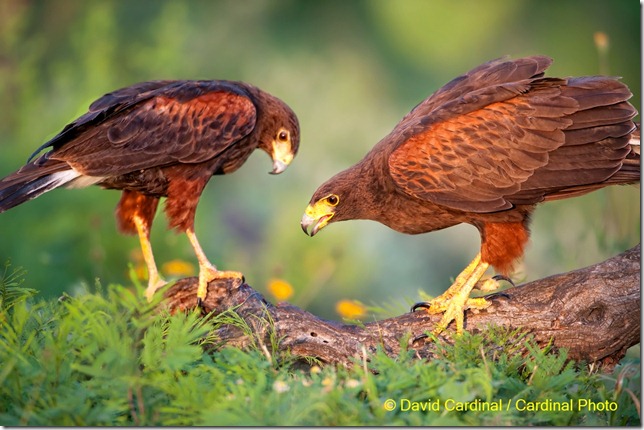
One of the downsides of the studio, single-perch approach, is that it requires attracting a specific bird or birds to a precise place – the perch. Often the easiest way to do this is with bird calls. I have nothing against calling in birds if done safely and sanely on private lands where the total amount of calling can be carefully monitored, but it is easy to overdo calling, and I don’t think it is a great idea to call birds in public areas where a single bird might be hassled with many calls in a day. So if you do rely on pulling the bird of your dreams into a particular setup with a call, keep the bird’s perspective in mind as well.
There are two other – related – downsides to a pure bird portrait studio. The first is that it can be downright boring to shoot in one. Many of us got interested in nature photography as a way to experience the outdoors and the variety of nature, so deliberately limiting our experience to a single perch while clearing away the surrounding habitat seems like a shame. The second is that, by definition, the photographed bird appears looking a certain way, which can detract from the variety of poses, surroundings, and behaviors you might witness and photograph in a more natural setting. The upside of the portrait approach is that pure setups are a great way to get classic “notecard” shots of birds, and can be used in otherwise barren or unlikely locations. Another advantage of studio set-ups is that you can change your perches at will, so if you only have one or two good locations, you can make them seem like a lot more.
The Bird Habitat Blind
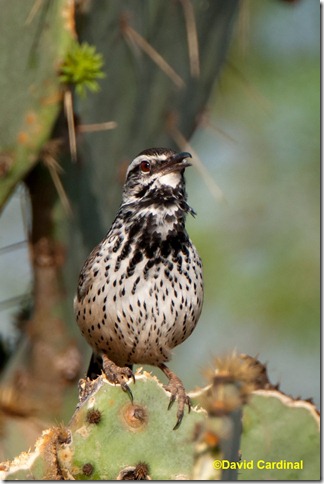
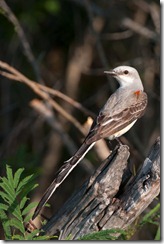 In contrast to a studio-type blind setting, one designed around birds’ habitats provides a very different flavor, and is capable of producing some very different photographs. The idea behind a habitat setup is to leverage already existing natural elements to create a realistic scene where birds come naturally and interact the way they might whether or not photographers were there. A great example of this is siting a blind near a large cactus or berry bush. The cactus can make for natural-looking environmental shots of the native Cactus Wren, while the berry bush may bring in all sorts of songbirds to flit around and fill up.
Because habitat blinds keep the natural texture of the surroundings, in my experience the birds seem more at home there. They have more cover nearby, making them feel safer and often providing a larger total number of birds. Photographically, of course, that is as much a challenge as a blessing. Birds can be all over the place, and often not exactly where you want them. It is easy to become distracted and miss the opportunity when a bird lands exactly where you want. Conversely, it is also seldom boring or unproductive. There is usually some activity of interest somewhere in view, even if it is only the regular “yard birds” that you’ve already photographed a dozen times.
Shots taken in natural habitats may not look as picture-posed as those from pure setups, but they do have a couple advantages. First, they can show more of the natural environment, simply because there is more of it to show, and second, there is more variety in them, so even if you are shooting the same species all morning, it might show up feeding, bathing, or perched in various bushes. One downside of habitat blinds is that to photograph a variety of habitats, you need a number of different blinds. It’s a bit like shooting a movie on location instead of simply building a set in a studio. This makes habitat blinds best suited for larger properties with a variety of habitats. For my photo safaris, for example, we try to find properties where everyone has plenty of options of habitat types to choose from, along with a pure “studio” setup or two for working on pure portrait shots
Water features are very helpful for both kinds of blinds, but especially for habitat blinds, as they signal to the birds a good reason which this particular patch of real estate is one they should visit instead of all their other options. Of course, they work better when it is hot and dry. Calls can also be very helpful in habitat blinds, but anecdotally I haven’t found them to be as important. An amazing example of a pure habitat blind – the birds aren’t even fed there – is the Pond blind on Dos Venadas. It is consistently one of the most productive blinds in the area, and all it involves is a sunken blind at one end of a small pond surrounded by native trees.
Natural blinds versus Nurtured blinds – Hybrid design
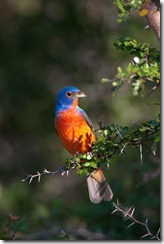 Lest you think I’m suggesting plopping some camo down in the middle of a forest and hoping for the best, I’m not. Even blinds based on existing habitat require careful design and re-design. If there is too much cover for the birds, they can’t be seen well enough to be photographed. If there are trees or shrubs behind the blind location then shadows will appear right where the birds do. And most of the time clean backgrounds are still a plus, so come clearing behind likely bird staging areas can be very helpful. Even small changes, like making the pond smaller or larger in the case of the pond blind at Dos Venadas, effects how many birds and mammals come to drink. Or in the case of the famous “Bobcat blind” that helped Hardy Jackson win the most recent Valley Land Fund contest with an eye-level shot of a bobcat at sunset, clearing out the brush to allow for better backgrounds resulted in the bobcat staying away. Needless to say, Hardy has let the brush grow back!
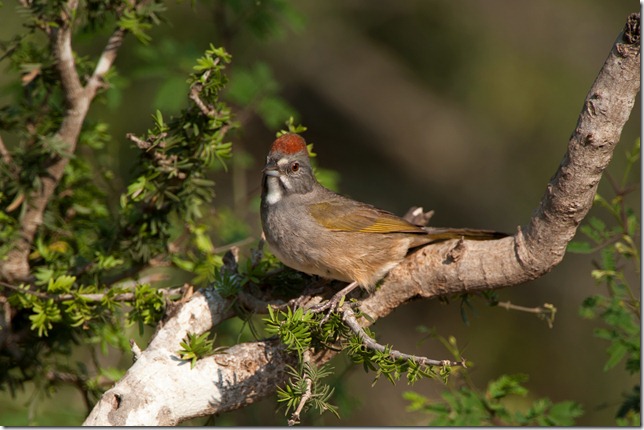
You can look for (or design) blinds which combine some of the elements of a studio-type blind and a habitat-type blind, but there are some tradeoffs. Clearing enough brush for the barren “firing range” look favored by many of the studio shooters often removes the nearby cover for birds, and reduces the likelihood of some of the more reluctant species (like Green-tailed Towhee in the case of south Texas) to come out and be photographed. Frequently when I’m shooting with workshop participants in a blind they’ll ask about why some branch or bush hasn’t been hauled off, since it gets in the way of some shots. Often the answer is that birds feel comfortable staging on or in it, and without it we’d be seeing less of them.
Much like camera brands there is a lot of “religion” around blind design and bird photography in general. Personally I don’t think there is a single right answer. The key, like with most of photography, is to start by knowing yourself, your limits, and your goals, and then to learn enough about your subject that you can make a plan. Then you can use some of the concepts in this article to help you pick out the right shooting locations to meet and eventually exceed your goals.
Doing and Learning more
There are all sorts of blinds set up for photographing all types of birds and mammals, so I certainly don’t claim this article is exhaustive. I do hope it gives you some food for thought as you consider designing your own bird photo blinds or even when you’re looking at using those others have set up for you. If you’d like to join us on either of our traditional bird photo trips, to the Rio Grande Valley of Texas in the beginning of May, 2013 or the Texas Hill Country photo safari the following week, we can not only provide you with some of the country’s best songbird photography, but work with you on setting up your individual shooting situation to help you achieve your photo goals. – David Cardinal
- Log in to post comments

