- Photo Safaris
- Alaska Bears & Puffins World's best Alaskan Coastal Brown Bear photo experience. Small group size, idyllic location, deluxe lodging, and Puffins!
- Participant Guestbook & Testimonials Candid Feedback from our participants over the years from our photo safaris, tours and workshops. We don't think there is any better way to evaluate a possible trip or workshop than to find out what others thought.
- Custom Photo Tours, Safaris and Personal Instruction Over the years we've found that many of our clients & friends want to participate in one of our trips but the dates we've scheduled just don't work for them or they'd like a customized trip for their family or friends.
- Myanmar (Burma) Photo Tour Myanmar (Burma) Photo Tour December 2017 -- with Angkor Wat option
- Reviews Go hands-on
- Camera Reviews Hands-on with our favorite cameras
- Lens reviews Lenses tested
- Photo Accessories Reviews Reviews of useful Photo and Camera Accessories of interest to our readers
- Useful Tools & Gadgets Handy tools and gadgets we've found useful or essential in our work and want to share with you.
- What's In My Camera Bag The gear David Cardinal shoots with in the field and recommends, including bags and tools, and why
- Articles About photography
- Getting Started Some photography basics
- Travel photography lesson 1: Learning your camera Top skills you should learn before heading off on a trip
- Choosing a Colorspace Picking the right colorspace is essential for a proper workflow. We walk you through your options.
- Understanding Dynamic Range Understanding Dynamic Range
- Landscape Photography Tips from Yosemite Landscape Photography, It's All About Contrast
- Introduction to Shooting Raw Introduction to Raw Files and Raw Conversion by Dave Ryan
- Using Curves by Mike Russell Using Curves
- Copyright Registration Made Easy Copyright Registration Made Easy
- Guide to Image Resizing A Photographers' Guide to Image Resizing
- CCD Cleaning by Moose Peterson CCD Cleaning by Moose Peterson
- Profiling Your Printer Profiling Your Printer
- White Balance by Moose Peterson White Balance -- Are You RGB Savvy by Moose Peterson
- Photo Tips and Techniques Quick tips and pro tricks and techniques to rapidly improve your photography
- News Photo industry and related news and reviews from around the Internet, including from dpreview and CNET
- Getting Started Some photography basics
- Resources On the web
- My Camera Bag--What I Shoot With and Why The photo gear, travel equipment, clothing, bags and accessories that I shoot with and use and why.
- Datacolor Experts Blog Color gurus, including our own David Cardinal
- Amazon Affiliate Purchases made through this link help support our site and cost you absolutely nothing. Give it a try!
- Forums User to user
- Think Tank Photo Bags Intelligently designed photo bags that I love & rely on!
- Rent Lenses & Cameras Borrowlenses does a great job of providing timely services at a great price.
- Travel Insurance With the high cost of trips and possibility of medical issues abroad trip insurance is a must for peace of mind for overseas trips in particular.
- Moose Peterson's Site There isn't much that Moose doesn't know about nature and wildlife photography. You can't learn from anyone better.
- Journeys Unforgettable Africa Journeys Unforgettable -- Awesome African safari organizers. Let them know we sent you!
- Agoda International discounted hotel booking through Agoda
- Cardinal Photo Products on Zazzle A fun selection of great gift products made from a few of our favorite images.
- David Tobie's Gallery Innovative & creative art from the guy who knows more about color than nearly anyone else
- Galleries Our favorite images
Photographing Kid’s Sports – Some Handy Tips
Photographing Kid’s Sports – Some Handy Tips
Submitted by David Cardinal on Tue, 05/25/2010 - 10:36
Starting with trying to capture your child’s first steps creating great images of kids in action is a lifelong and challenging task. Children’s sports are heavily photographed by parents, but usually without much success. In this article we’ll give you some tips on how to get the best images you can at sporting events…

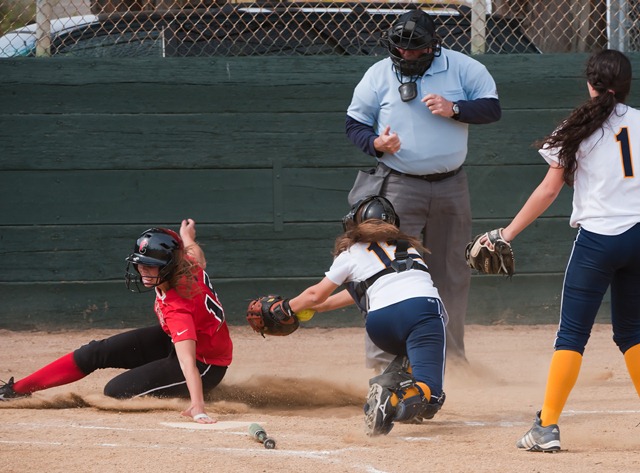
Shooting with a 200-400 on a monopod allowed me to capture this image from beyond first base
and freeze the action easily. Nikon D700, f/8@1/1000s, ISO 800.
Know your Equipment
If you want a quick portrait of your favorite athlete or an outdoor portrait of their team a point and shoot might be fine. And with a low-end D-SLR and inexpensive lens you can get some reasonable shots of field sports as long as you don’t expect too much in the way of action shots.
But to get great shots and capture action you’re going to need to invest in a fairly fast zoom. Ideally an f/2.8 lens or an f/4 lens with internal focusing motors (Nikon calls these AF-S, Canon calls them USM) is what you want to have. There is no free lunch here. The lenses used by pros are big, heavy and expensive. The lightest weight and cost alternative is probably the 70-200f/2.8. For most field sports you’ll want to have the option to use it with a teleconverter. The combo will set you back about $2,000 (not including your camera body) so save your pennies. We’ll discuss some other options later.
Perhaps surprisingly your camera body is a little less crucial. A faster frame rate, faster focusing system and better white balance detection are all a big plus but with a fast lens you can really do quite well with almost any current D-SLR. You’ll need to time your shutter releases well if you don’t have the luxury of a high frame rate. If your camera has a vertical grip accessory that increases the frame rate (like the D300 and D700) then it’ll be a good investment.
Indoors your camera body gets more critical, since lighting is usually poor. In that case the lower noise sensor you have the more effective you can be. For example, bumping the ISO up to 1600 or even 3200 on a D700 similar camera gives you a much better chance of freezing the action (by selecting a higher shutter speed) than if you’re “stuck” at ISO 400 or ISO 800 by your camera’s noise profile.

A high frame rate really helps when the ball is in motion. It is
very hard to get images of the ball moving in most sports without taking
 a burst. I always use my vertical grip on my D700 to maximize my
frame rate and make shooting verticals easier. Nikon D700,
200-400f/4, f/8@1/1000s,
 ISO 800.
Know your Sport
Like with any type of photography homework is critical in sports photography. Learn about the sport you are going to photograph. Watch it—live if possible or on TV if not—and pay attention to what you consider the exciting plays and where they take place. Make sure and ask the athletes which shots they think are cool. And the web is a great source of information from other photographers on which are the “classic” images for a particular sport.
Think about how far away the action occurs and what focal length you’ll need to make the most of it. Remember that the age of the athletes you are photographing affects their size and the type of lens you’ll need. For example a 70-200 without a Teleconverter is much to short to photograph kid’s soccer on a large field—even right from the sidelines, but for an adult league you can do quite well with it.

  Even in this fairly well lit gym I needed to use ISO 1600 to keep some
DOF in this image.    Nikon D2X, 1/160s@f/8, 70-200f/2.8@80mm.
 Unfortunately like most indoor venues the lighting is nowhere near
daylight and skin doesn’t look completely natural.
Know your Venue
Every stadium and gymnasium is different. They all have different lighting conditions, backgrounds, and shooting locations. In general you’ll want to get close to the action but in many sports there are either physical barriers or rules which prevent you from being where you’d like. In some sports like Baseball and Fast-pitch Softball no one except the players and base coaches are allowed on the field of play for safety reasons. In others an offer to provide publicity images to the coach or school Athletic Director might get you access to the sidelines where you can get some close-up images.

Backgrounds are often picked for you in sports, but when you can
position yourself    to get clean contrasting backgrounds the extra
 effort is well worth it.
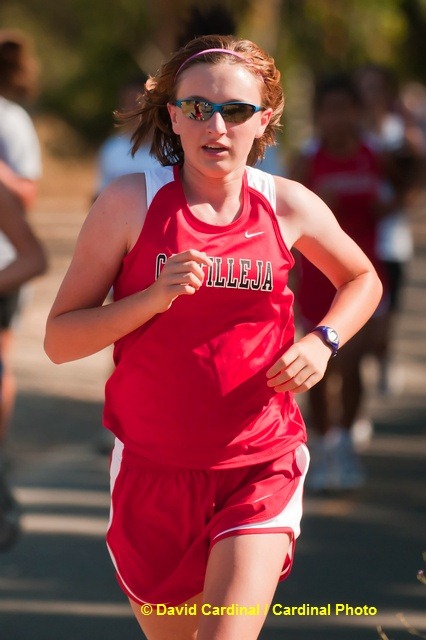
For running, horse or kart sports know the course. Plan out where you’ll get the best images with the sun where you want it and clean backgrounds if possible. If the course is large decide whether you can effectively get to more than one place to photograph and which participants are your priority. In cross-country for example you may need to choose whether to capture images of all members of the team at a particular point or sprint to the finish to catch the leaders as they come across.
Know Yourself
During a game is a poor time to discover whether you can hand hold your telephoto lens for two hours and after the game is no time to discover whether you can hand hold for sharp images at your selected shutter speed, so in advance you’ll want to do some experiments. Decide whether you’ll need a monopod (or tripod for sports where you can stay planted in one place) and what shutter speed you need for sharp images—which of course will also depend on the speed of the action. I try to use at least 1/1000s if I can for sharp action photos although slower speeds can certainly work much of the time.

This image of Sammy Albanese, recent National Player of the Week,
that I shot for the CBS subsidiary, maxpreps.com was taken through a chain link fence
since there were no photo cutouts behind the plate for this playoff game.
Nikon D700, 200-400f/4 at 310mm, 1/8000s@f/4

Shooting through Fences
A common problem with ball sports is needing to shoot through a fence. This is never ideal but for certain situations like getting front shots of a pitcher it may be the only option. To make it work put your lens right up against the chain link and set your aperture to wide open—either use a collapsible lens hood or remove your lens hood when you do this. I use my hand to protect the front of the lens from the chain link. This gives you the best chance of eliminating the effect of the fence. If you get a choice a darker color chain link works better and in all cases make sure you shade the fence if it is in the sun so you don’t get glare off the metal.
Shooting Backlit
Backlit athletes pose a very tricky metering problem. And on a sunny day of course about half of the athletes will have their faces in the shade at any given time—more if they are wearing caps. If you have a mix of players in the sun and shade there isn’t much you can do to fiddle with your meter as over-exposing to get the shaded faces right will blow-out the sunny faces. In that case your best bet may be the Fill Light slider in Adobe Camera Raw or the Shadow/Highlight tool in Photoshop.
If you are only photographing athletes in the shade (for example if you are focused on one end of a tennis court), then you can spot meter off some mid-tone object in the shade. That will ensure that you get a good image of your subjects’ face although prepare for some major use of the Highlight Recovery feature in your raw processor to limit the image damage you’ll get from the sunny portions being over-exposed.
Using Flash
Flash—or even better strobes—is incredibly helpful for photographing indoor sports. However, many leagues do not allow it or even when they do many coaches and athletes will not let it be used. So this is a tricky area and you’re best off not using flash unless you can get permission in advance from the parties involved. If you can use flash it does two very important things. First it of course provides more light, which is particularly important in older gyms and venues which don’t have the kind of lights needed for photography or television. And second it provides a better quality of light than most of the cost-saving lights found in non-professional sporting arenas. (Pro and high-end college venues tend to have pretty good lighting to make sure the TV coverage looks good)
If you can’t use flash be prepared for some really high ISO shooting. Larger sensor cameras like the new full frame models will perform best under those circumstances. In a poorly lit high school venue you may need to be shooting at ISO3200 and still have trouble getting enough shutter speed to create tack sharp images. In these situations a fast lens (f/2.8 or faster) is really important.
Share your Tips!
This article only scratches the surface of some of the techniques for shooting sports. Please share your tips and experiences in our Sports Photography forum on nikondigital.org.
- Log in to post comments

Latest posts
-
Tue, Jun 14 2022
-
Fri, Jul 9 2021
-
Mon, Mar 1 2021
-
Tue, Mar 3 2020
-
Wed, Jan 15 2020
-
Mon, Nov 11 2019